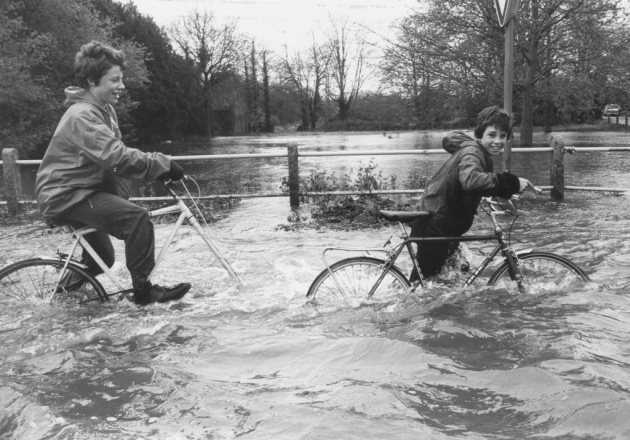
Photo Gallery Floods, AylshamAll1912 Flood1993 FloodOther - Floods Postcard of Millgate flood Gallery Postcard of Millgate flood Postcard of Millgate flood Gallery Postcard of Millgate flood Postcard of Millgate flood Gallery Postcard of Millgate flood Postcard of Millgate flood Gallery Postcard of Millgate flood Postcard of Millgate flood Gallery Postcard of Millgate flood Millgate flood. Mash’s Row in background Gallery Millgate flood. Mash’s Row in background Millgate flood. Looking from bridge towards staithe Gallery Millgate flood. Looking from bridge towards staithe Temporary bridge over the Bure at Ingworth Gallery Temporary bridge over the Bure at Ingworth Photo of newspaper headline Gallery Photo of newspaper headline Photo of EDP headline Gallery Photo of EDP headline Photo of newspaper article re floods at Aylsham Gallery Photo of newspaper article re floods at Aylsham Millgate flood. Mash’s Row in the background Gallery Millgate flood. Mash’s Row in the background Barclay Palletts wherry aground at Buxton Gallery Barclay Palletts wherry aground at Buxton Cooks wherry ‘Zulu’ being taken around Buxton lock Gallery Cooks wherry ‘Zulu’ being taken around Buxton lock River Bure in spate Gallery River Bure in spate River Bure in spate Gallery River Bure in spate Millgate flood – Mash’s Row in background Gallery Millgate flood – Mash’s Row in background Millgate flood – Mash’s Row in background Gallery Millgate flood – Mash’s Row in background Ingworth bridge, partly washed away Gallery Ingworth bridge, partly washed away Millgate flood. Mash’s Row in background Gallery Millgate flood. Mash’s Row in background The Staithe. From NW/Millgate granary on right Gallery The Staithe. From NW/Millgate granary on right Ingworth bridge, partly washed away Gallery Ingworth bridge, partly washed away Various other photos of 1912 flood Gallery Various other photos of 1912 flood Various other photos of 1912 flood Gallery Various other photos of 1912 flood Various other photos of 1912 flood Gallery Various other photos of 1912 flood Various other photos of 1912 flood Gallery Various other photos of 1912 flood Various other photos of 1912 flood Gallery Various other photos of 1912 flood …and more (BH) Gallery …and more (BH) Work to repair Blackwater railway Bridge after Aug flood Gallery Work to repair Blackwater railway Bridge after Aug flood Mash’s Row, 1980s Gallery Mash’s Row, 1980s Mash’s Row, 1980s Gallery Mash’s Row, 1980s Mash’s Row, 1980s Gallery Mash’s Row, 1980s Mash’s Row, 1980s Gallery Mash’s Row, 1980s Mash’s Row, 1980s Gallery Mash’s Row, 1980s Flood, 1981 Gallery Flood, 1981 Mash’s Row 12th October Gallery Mash’s Row 12th October Mash’s Row 12th October Gallery Mash’s Row 12th October Mash’s Row 12th October Gallery Mash’s Row 12th October Mash’s Row 12th October Gallery Mash’s Row 12th October The Staithe 12th October Gallery The Staithe 12th October The Mill Pool 12th October Gallery The Mill Pool 12th October The Mill Pool 12th October Gallery The Mill Pool 12th October Pictures donated by Geoff Gale Gallery Pictures donated by Geoff Gale Pictures donated by Geoff Gale Gallery Pictures donated by Geoff Gale Pictures donated by Geoff Gale Gallery Pictures donated by Geoff Gale Pictures donated by Geoff Gale Gallery Pictures donated by Geoff Gale Pictures donated by Geoff Gale Gallery Pictures donated by Geoff Gale Pictures donated by Geoff Gale Gallery Pictures donated by Geoff Gale Pictures donated by Geoff Gale Gallery Pictures donated by Geoff Gale Pictures donated by Geoff Gale Gallery Pictures donated by Geoff Gale Pictures donated by Geoff Gale Gallery Pictures donated by Geoff Gale Pictures donated by Geoff Gale Gallery Pictures donated by Geoff Gale Pictures donated by Geoff Gale Gallery Pictures donated by Geoff Gale Pictures donated by Geoff Gale Gallery Pictures donated by Geoff Gale Pictures donated by Geoff Gale Gallery Pictures donated by Geoff Gale Pictures donated by Geoff Gale Gallery Pictures donated by Geoff Gale Pictures donated by Geoff Gale Gallery Pictures donated by Geoff Gale Pictures donated by Geoff Gale Gallery Pictures donated by Geoff Gale Pictures donated by Geoff Gale Gallery Pictures donated by Geoff Gale Pictures donated by Geoff Gale Gallery Pictures donated by Geoff Gale Pictures donated by Geoff Gale Gallery Pictures donated by Geoff Gale Pictures donated by Geoff Gale Gallery Pictures donated by Geoff Gale Pictures donated by Geoff Gale Gallery Pictures donated by Geoff Gale Pictures donated by Geoff Gale Gallery Pictures donated by Geoff Gale Pictures donated by Geoff Gale Gallery Pictures donated by Geoff Gale Pictures donated by Geoff Gale Gallery Pictures donated by Geoff Gale Pictures donated by Geoff Gale Gallery Pictures donated by Geoff Gale More pictures donated by Geoff Gale Gallery More pictures donated by Geoff Gale More pictures donated by Geoff Gale Gallery More pictures donated by Geoff Gale More pictures donated by Geoff Gale Gallery More pictures donated by Geoff Gale More pictures donated by Geoff Gale Gallery More pictures donated by Geoff Gale More pictures donated by Geoff Gale Gallery More pictures donated by Geoff Gale More pictures donated by Geoff Gale Gallery More pictures donated by Geoff Gale More pictures donated by Geoff Gale Gallery More pictures donated by Geoff Gale More pictures donated by Geoff Gale Gallery More pictures donated by Geoff Gale More pictures donated by Geoff Gale Gallery More pictures donated by Geoff Gale More pictures donated by Geoff Gale Gallery More pictures donated by Geoff Gale More pictures donated by Geoff Gale Gallery More pictures donated by Geoff Gale More pictures donated by Geoff Gale Gallery More pictures donated by Geoff Gale More pictures donated by Geoff Gale Gallery More pictures donated by Geoff Gale More pictures donated by Geoff Gale Gallery More pictures donated by Geoff Gale More pictures donated by Geoff Gale Gallery More pictures donated by Geoff Gale More pictures donated by Geoff Gale Gallery More pictures donated by Geoff Gale More pictures donated by Geoff Gale Gallery More pictures donated by Geoff Gale More pictures donated by Geoff Gale Gallery More pictures donated by Geoff Gale More pictures donated by Geoff Gale Gallery More pictures donated by Geoff Gale More pictures donated by Geoff Gale Gallery More pictures donated by Geoff Gale More pictures donated by Geoff Gale Gallery More pictures donated by Geoff Gale More pictures donated by Geoff Gale Gallery More pictures donated by Geoff Gale More pictures donated by Geoff Gale Gallery More pictures donated by Geoff Gale More pictures… Gallery More pictures… More pictures… Gallery More pictures…